
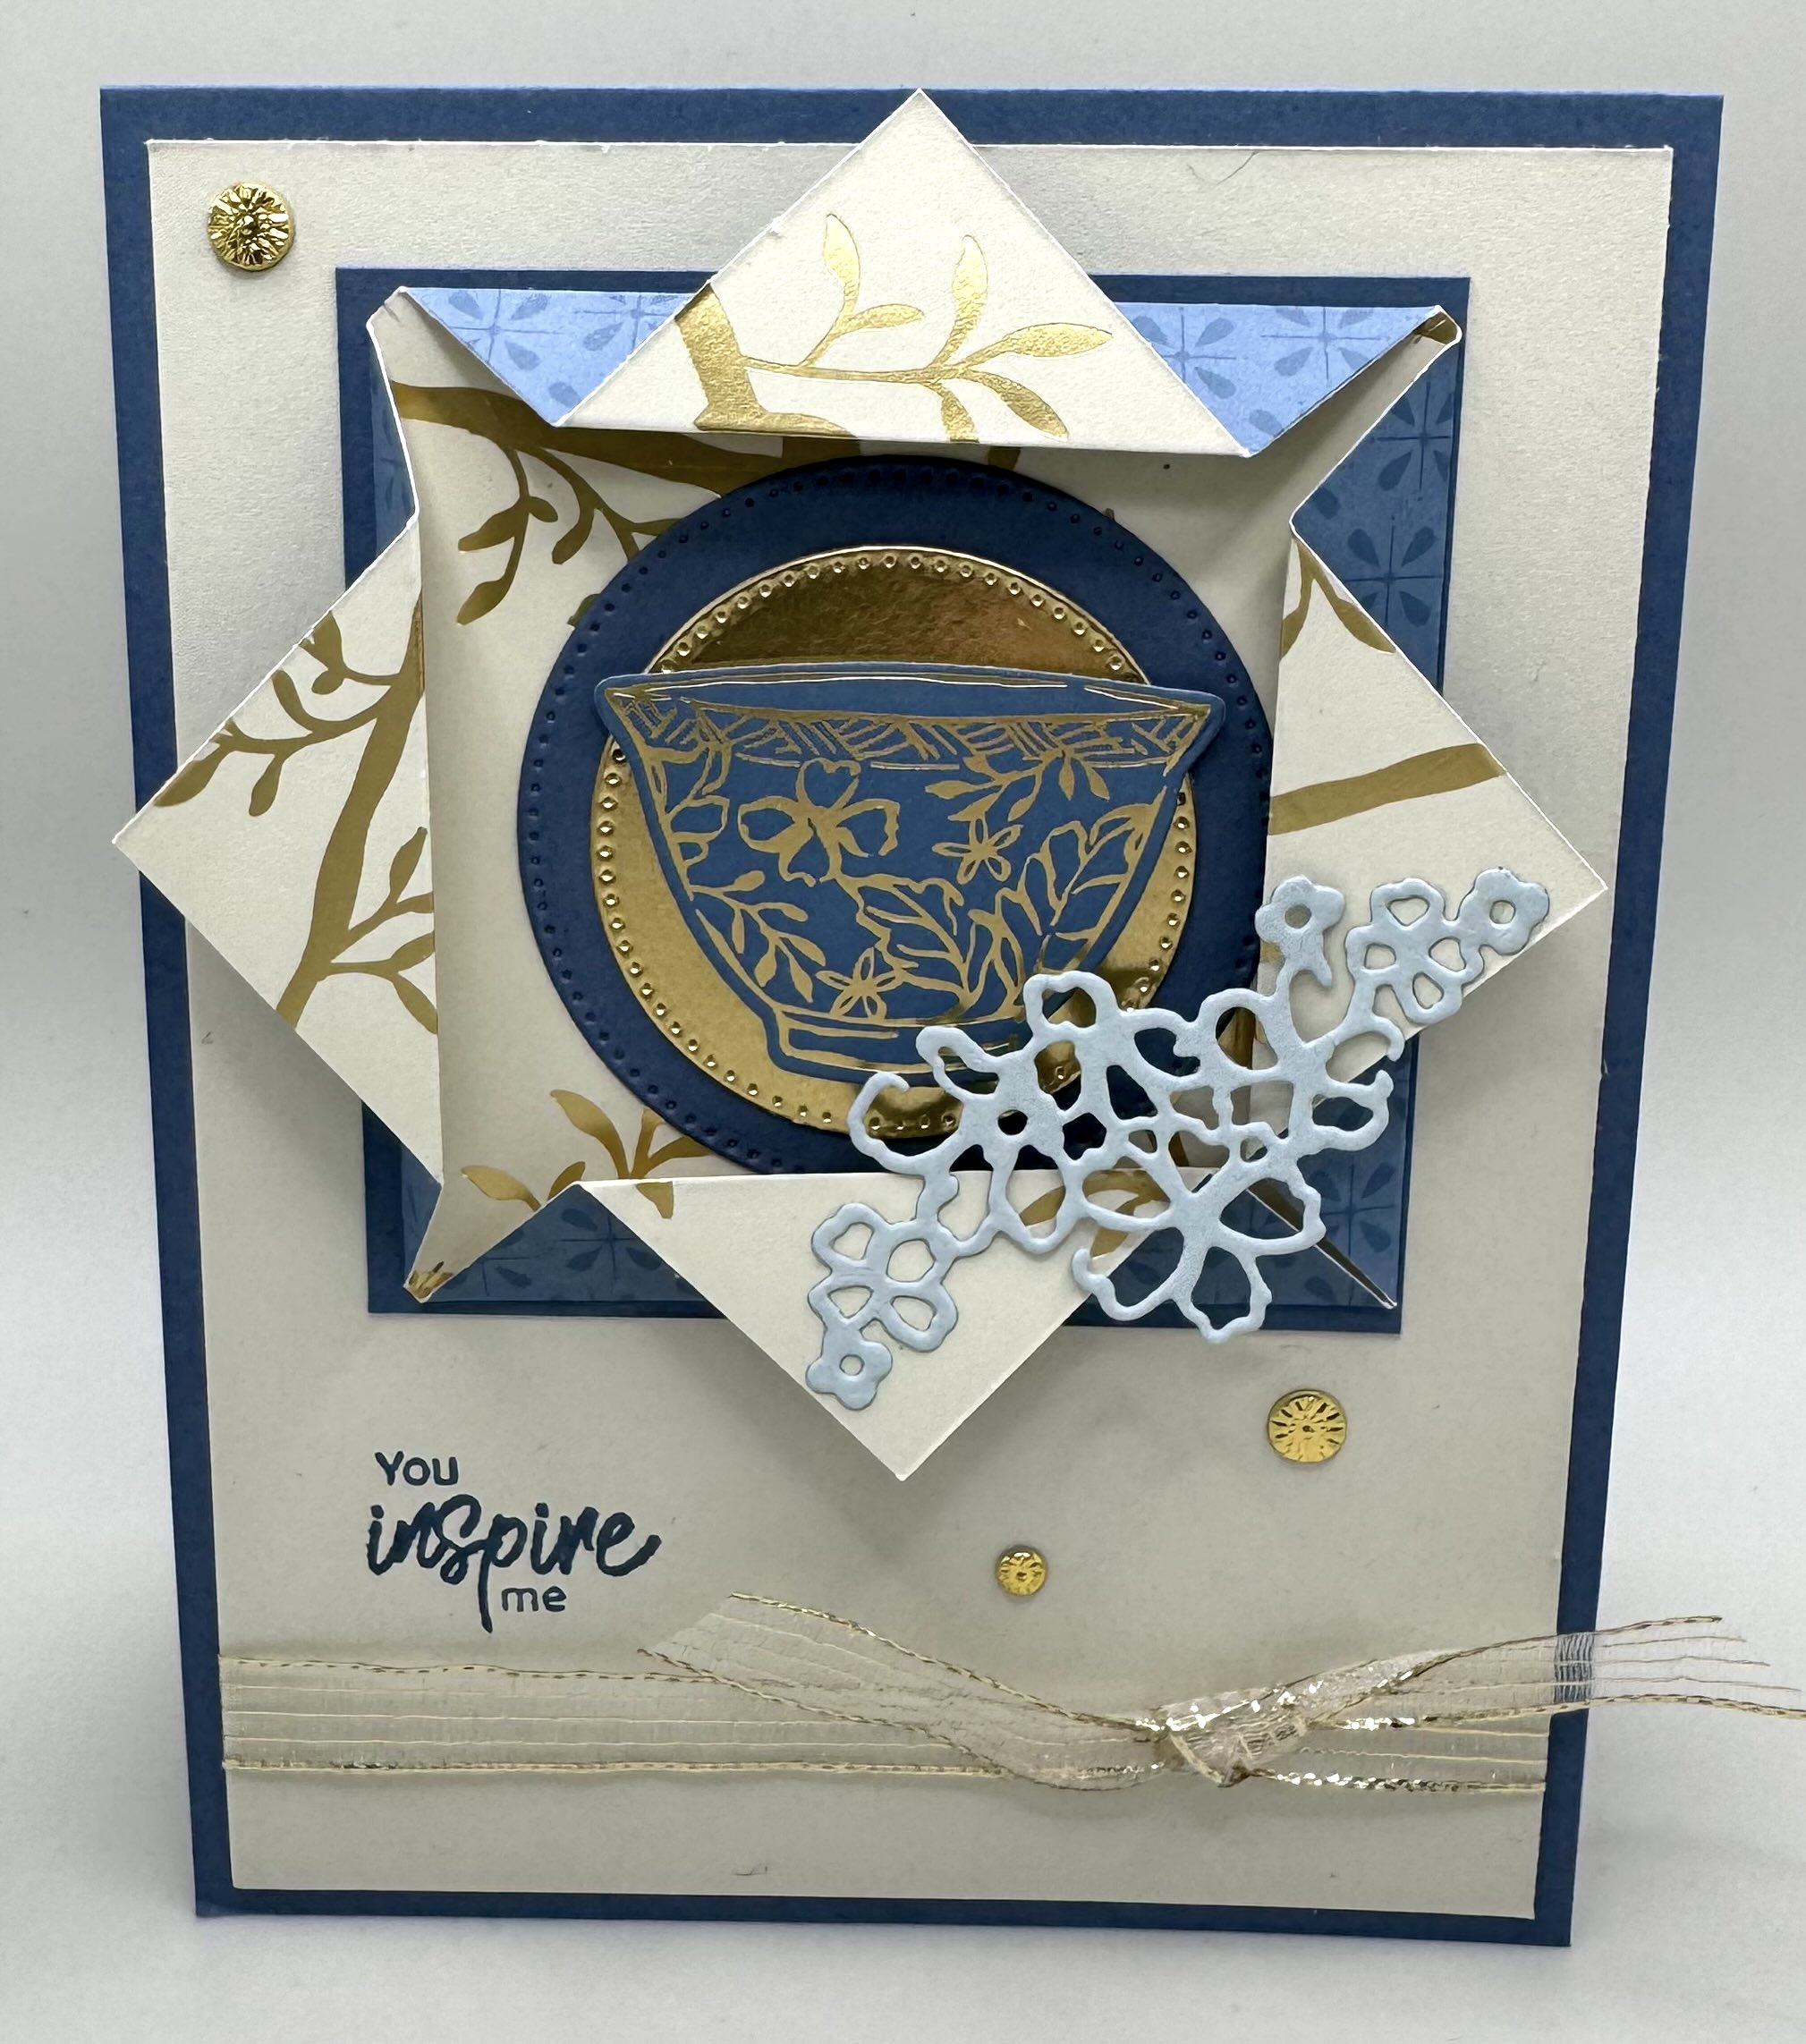
I haven’t made an origami style card in a while and I’m so glad I played around with this fold again. It brought me to making one with the spectacular Kintsugi Inspirations Suite. I am pretty certain it’s my favorite suite in the new annual catalog. Every single thing you make with this suite is going to be pretty special. Pairing it with some origami makes it eve more special!!


I love the DSP so much. When you use it, the card is beautiful even before you stamp and embellish it. I used Misty Moonlight for the Base and used Basic Beige for the layers. I used the coordinating embossing folder to emboss the front panel. After folding my origami window, I layered it on a square of Misty Moonlight. I die cut a pottery vase from the DSP and then 2 circles from the Stylish Shapes dies – one in Misty Moonlight and one in Gold Metallic (and you can die cut right from the hidden parts of the front layer and square since they get covered up by the origami piece.) I also die cut some the flowers in Cloud Cover. I finished off the card with a gold embossed greeting die cut using the tag die, some ribbon and gems. It’s so pretty I made two so I added a photo of the front of my second card! Here’s what you need to know to create this card.
CUTTING/SCORING MEASUREMENTS
BASE: (Misty Moonlight) 4 1/4″x11″, scored at5 1/2″; (Basic Beige – embossed) 4″x5 1/4″; (Basic Beige inside) 4″x5 1/4″
ORIGAMI: (DSP) 4″x4″, create tick marks at 1 1/4″, 2″, and 2 3/4″ on all 4 sides, then score 2″ to 2″ and then 2 3/4″ to 2 3/4″ **refer to video for reference; (Misty Moonlight) 3″x3″


I used the Year of Flowers Bundle to create this card. I love that there is a flower for every birth month – that means I can customize it! I used Blackberry Bliss for the base and Berry Burst for the layer. I stamped in Memento Ink and used Stampin Blends to color in my flowers as close to the July flower color as possible. This card is for a dear friend’s mother who is like a second mom. She makes cards and sends them to me so we have a special card crafting bond!


How cute is this last card? I simplified this one by simply using Crumb Cake and Cherry Cobbler for the base. I used the Timeless Plaid DSP and most of the decorations are the laser cut pieces from the Storybook Moments DSP. I stamped in Cherry Cobbler. This one is so simple but it’s still quite adorable.
Which one will you make? It’s fun to browse through your paper stash and see all the possibilities for this fun old. I hope you enjoy creating with it as much as I do!
Happy Crafting!