
Do you love writing long messages inside the cards you send? Maybe you’re creating a card for a group to sign and need plenty of room for everyone to add a special note. Or perhaps you simply want to surprise someone with an interactive handmade card that keeps opening and opening!
Whatever the reason, this Expanding Panel Card is definitely a fun fold card you’ll want to know how to make.
At first glance, it looks like a standard A2 card. But when you open it, the card expands to more than 15 inches long. WOW! All that extra space gives you plenty of room for writing, decorating, adding photos, or collecting signatures from a group.
This Expanding Panel Card tutorial is also easy to customize. I created three completely different versions to show you just how versatile this fun fold design can be.


Scenic Coast Expanding Panel Card
Who doesn’t love a beautiful sunset? Or maybe you’re on the East Coast and see this gorgeous scene as a sunrise! Either way, it’s beautiful—and every single piece of this paper is a little different.
Are you a sunset person or a sunrise person?
I used to be a sunset kind of girl, but lately I’ve gotten into the habit of waking up a few hours before my spouse. I love having that quiet “me time” in the morning, and now I’m really beginning to appreciate beautiful sunrises, too.
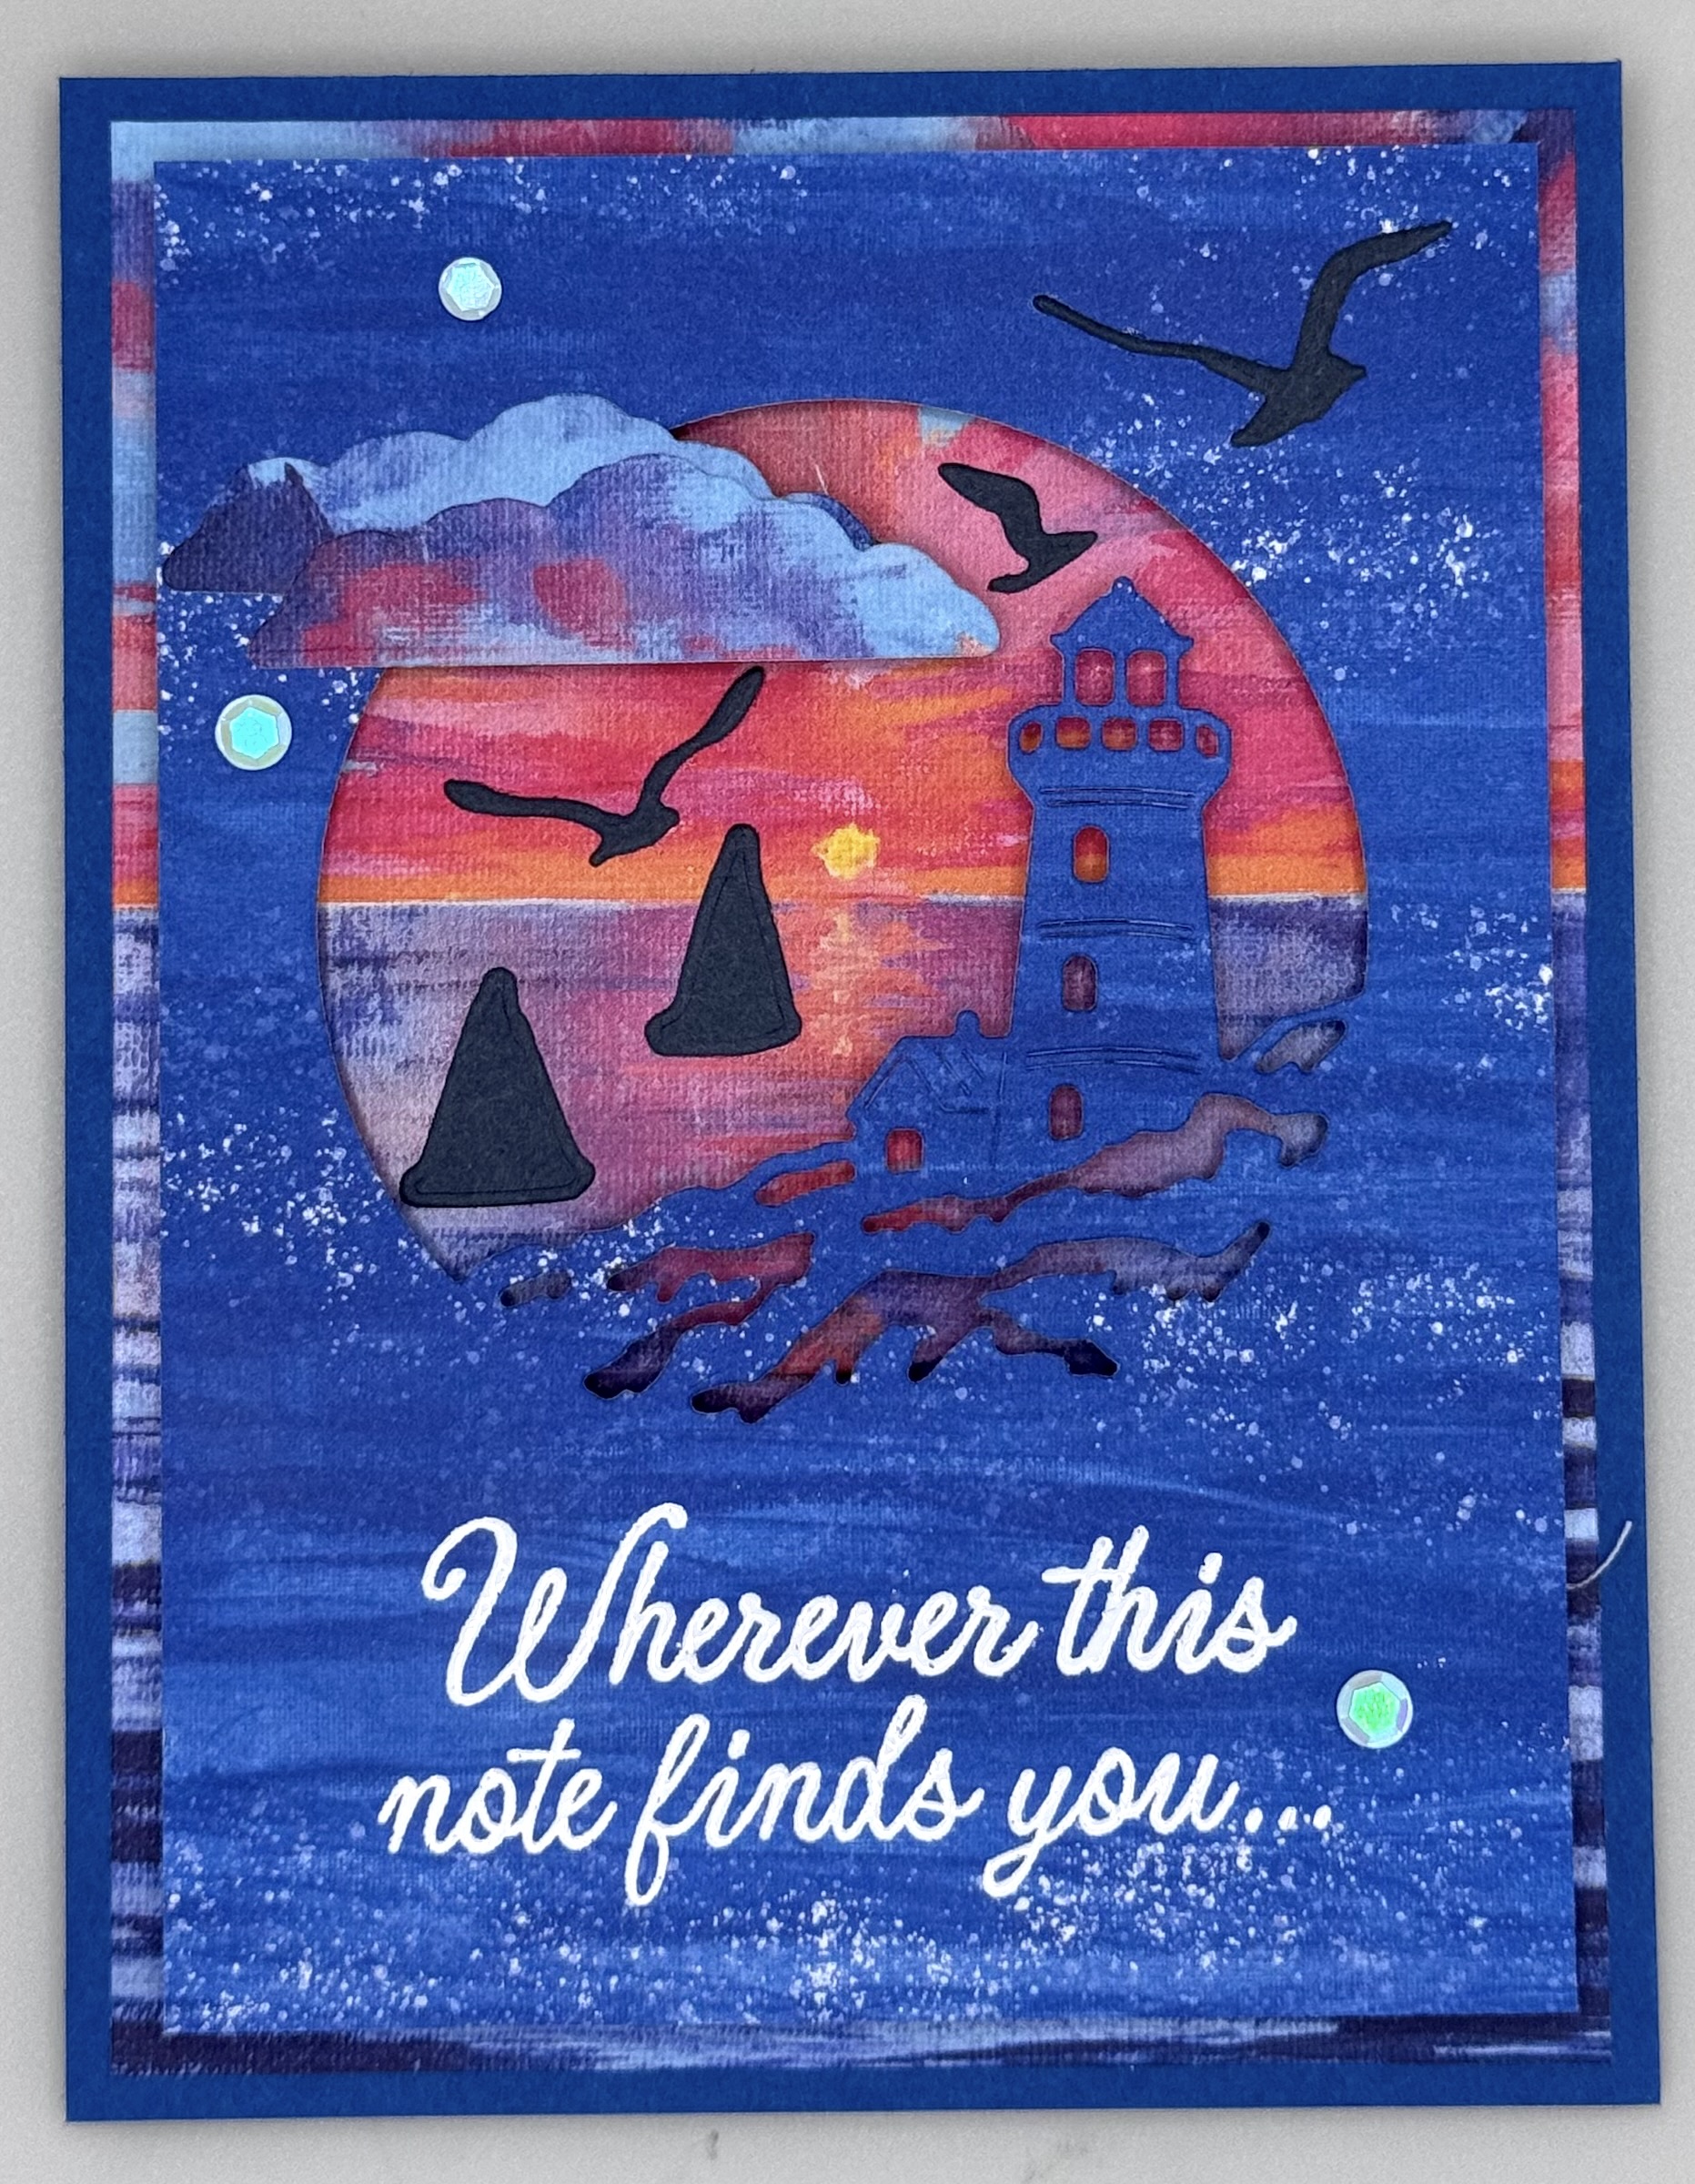
For my first Expanding Panel Card, I used the Scenic Coast Suite, and this card turned out so pretty! I absolutely love every product in this suite. Everything coordinates beautifully and feels so thoughtfully designed.
The Scenic Coast 6” x 6” Designer Series Paper is stunning, with gorgeous iridescent sunset and sunrise scenes. The reverse sides have beautiful backgrounds and versatile patterns, too, which means you’ll want to use every single piece!
I used Blueberry Bushel cardstock for the front and back panels and Basic White cardstock for the center expanding panel. The rest of the card is designed to show off all that gorgeous Designer Series Paper.
For the focal point on the front, I used the coordinating dies to create a scenic lighthouse design. I used Adhesive Strips to raise the top layer and give the scene a beautiful 3D effect. If you don’t have Adhesive Strips, Stampin’ Dimensionals would work, too.
I heat embossed the greeting with white embossing powder, then added clouds die cut from scraps of Designer Series Paper. The birds and sailboats were die cut from Secret Sea cardstock. A few Sunset Sparkle Sequins added the perfect finishing touch.
I love how this handmade card came together. It’s such a beautiful card to send for a birthday, thank-you, thinking-of-you occasion, or simply to let someone know you care.
Here’s what you need to know to create this card.
CUTTING/SCORING MEASUREMENTS
BASE: (Blueberry Bushel) 4 1/4″x5 1/2″ (x2)
FRONT LAYERS: (DSP) 4″x5 1/4″; 3 3/4″x5″
EXPANDING INSIDE PANEL; (Basic White) 3 3/4″x11″, scored at 5″ and 10″
INSIDE LAYERS: (DSP) 3 3/4″x5″; 3 3/4″x1 1/4″


Homemade Sweetness Birthday Card
It had been a while since I pulled out the Homemade Sweetness Suite Collection, and I thought this Expanding Panel Card design was the perfect opportunity to use it again.
For this card, I started with a Strawberry Slush card base. I decorated the front with Designer Series Paper and added a layer of vellum embossed with the Ladybug Picnic 3D Embossing Folder. The embossed vellum adds texture without covering up too much of the pretty paper underneath.
I stamped the berries in black ink and colored them with Strawberry Slush and Granny Apple Green Stampin’ Blends. I also added a little Clear Wink of Stella to make the berries look extra juicy and delicious!
Since I wanted to turn this version into a birthday card, I borrowed greetings from Balloon Festoon. I love mixing and matching my stamp sets, especially when I’m looking for a particular word or sentiment. Don’t be afraid to look through the stamp sets you already own and combine greetings to create exactly what you need.
As you can see, the Expanding Panel Card is a great choice when you need lots of room for signatures or want to write a longer personal message.
I rarely just sign my name inside a card. There’s always something to say!


Horizontal Expanding Panel Card
For my final sample, I changed things up and created a horizontal version of the Expanding Panel Card.
I love all things trees and forests, so when I saw the Simply Leaves stamp set, I knew I had to have it. There’s also a coordinating bundle that includes a handy leaf punch.
I paired the stamped images with the Textured Tree Ring 3D Embossing Folder to create a rustic, nature-inspired handmade card.
For even more texture, I embossed two-tone cardstock and used a sanding block to gently roughen the surface. This allows the white core of the cardstock to show through and creates a wonderful weathered, rustic look.
Instead of using Basic White cardstock for the center expanding panel, I used the 2026–2028 Gingham Gallery Designer Series Paper.
I love plaid, so this paper was an easy choice for me!
Changing the orientation and using patterned paper for the center panel gives this version a completely different look while keeping the same basic Expanding Panel Card design.
Make Your Own Expanding Panel Fun Fold Card
Now you know how to make an Expanding Panel Card that looks like a standard A2 card when closed but opens to reveal an impressive display with lots of extra space.
This fun fold card is perfect for:
● Group signature cards
● Birthday cards
● Retirement cards
● Farewell cards
● Anniversary cards
● Cards with long personal messages
● Photo cards
● Special keepsake cards
Whether your card is signed by one person or an entire group, this interactive fun fold is sure to be treasured.
With just a few cuts and score lines, along with some beautiful Designer Series Paper, cardstock, stamps, dies, and ink, you can create a handmade card that looks like a masterpiece!
I hope you’ll give this Expanding Panel Card tutorial a try. Have fun experimenting with different papers, themes, and orientations to make the design completely your own.
Happy Crafting!!