
Front Flap Fun Fold…Front Flap Fun Fold…Front Flap Fun Fold. Say that a whole bunch of times and you’re sure to get a little tongue-tied! 😂
However you say it, this Front Flap Fun Fold Card is an absolute joy to create. I always love a tried-and-true card fold that is easy to make, incredibly versatile, and can be adapted to almost any occasion or style. This one checks all the boxes!
It’s simple enough for a beginner but gives you plenty of opportunities to get creative. You can even add one or two pockets inside to hold photos, gift cards, or little notes. There are just so many ways to take this card to the next level.
So, the next time you want to make some cards but can’t decide what fun fold to try, you really can’t go wrong with this one. It just works!


A Fall-Themed Front Flap Fun Fold Card
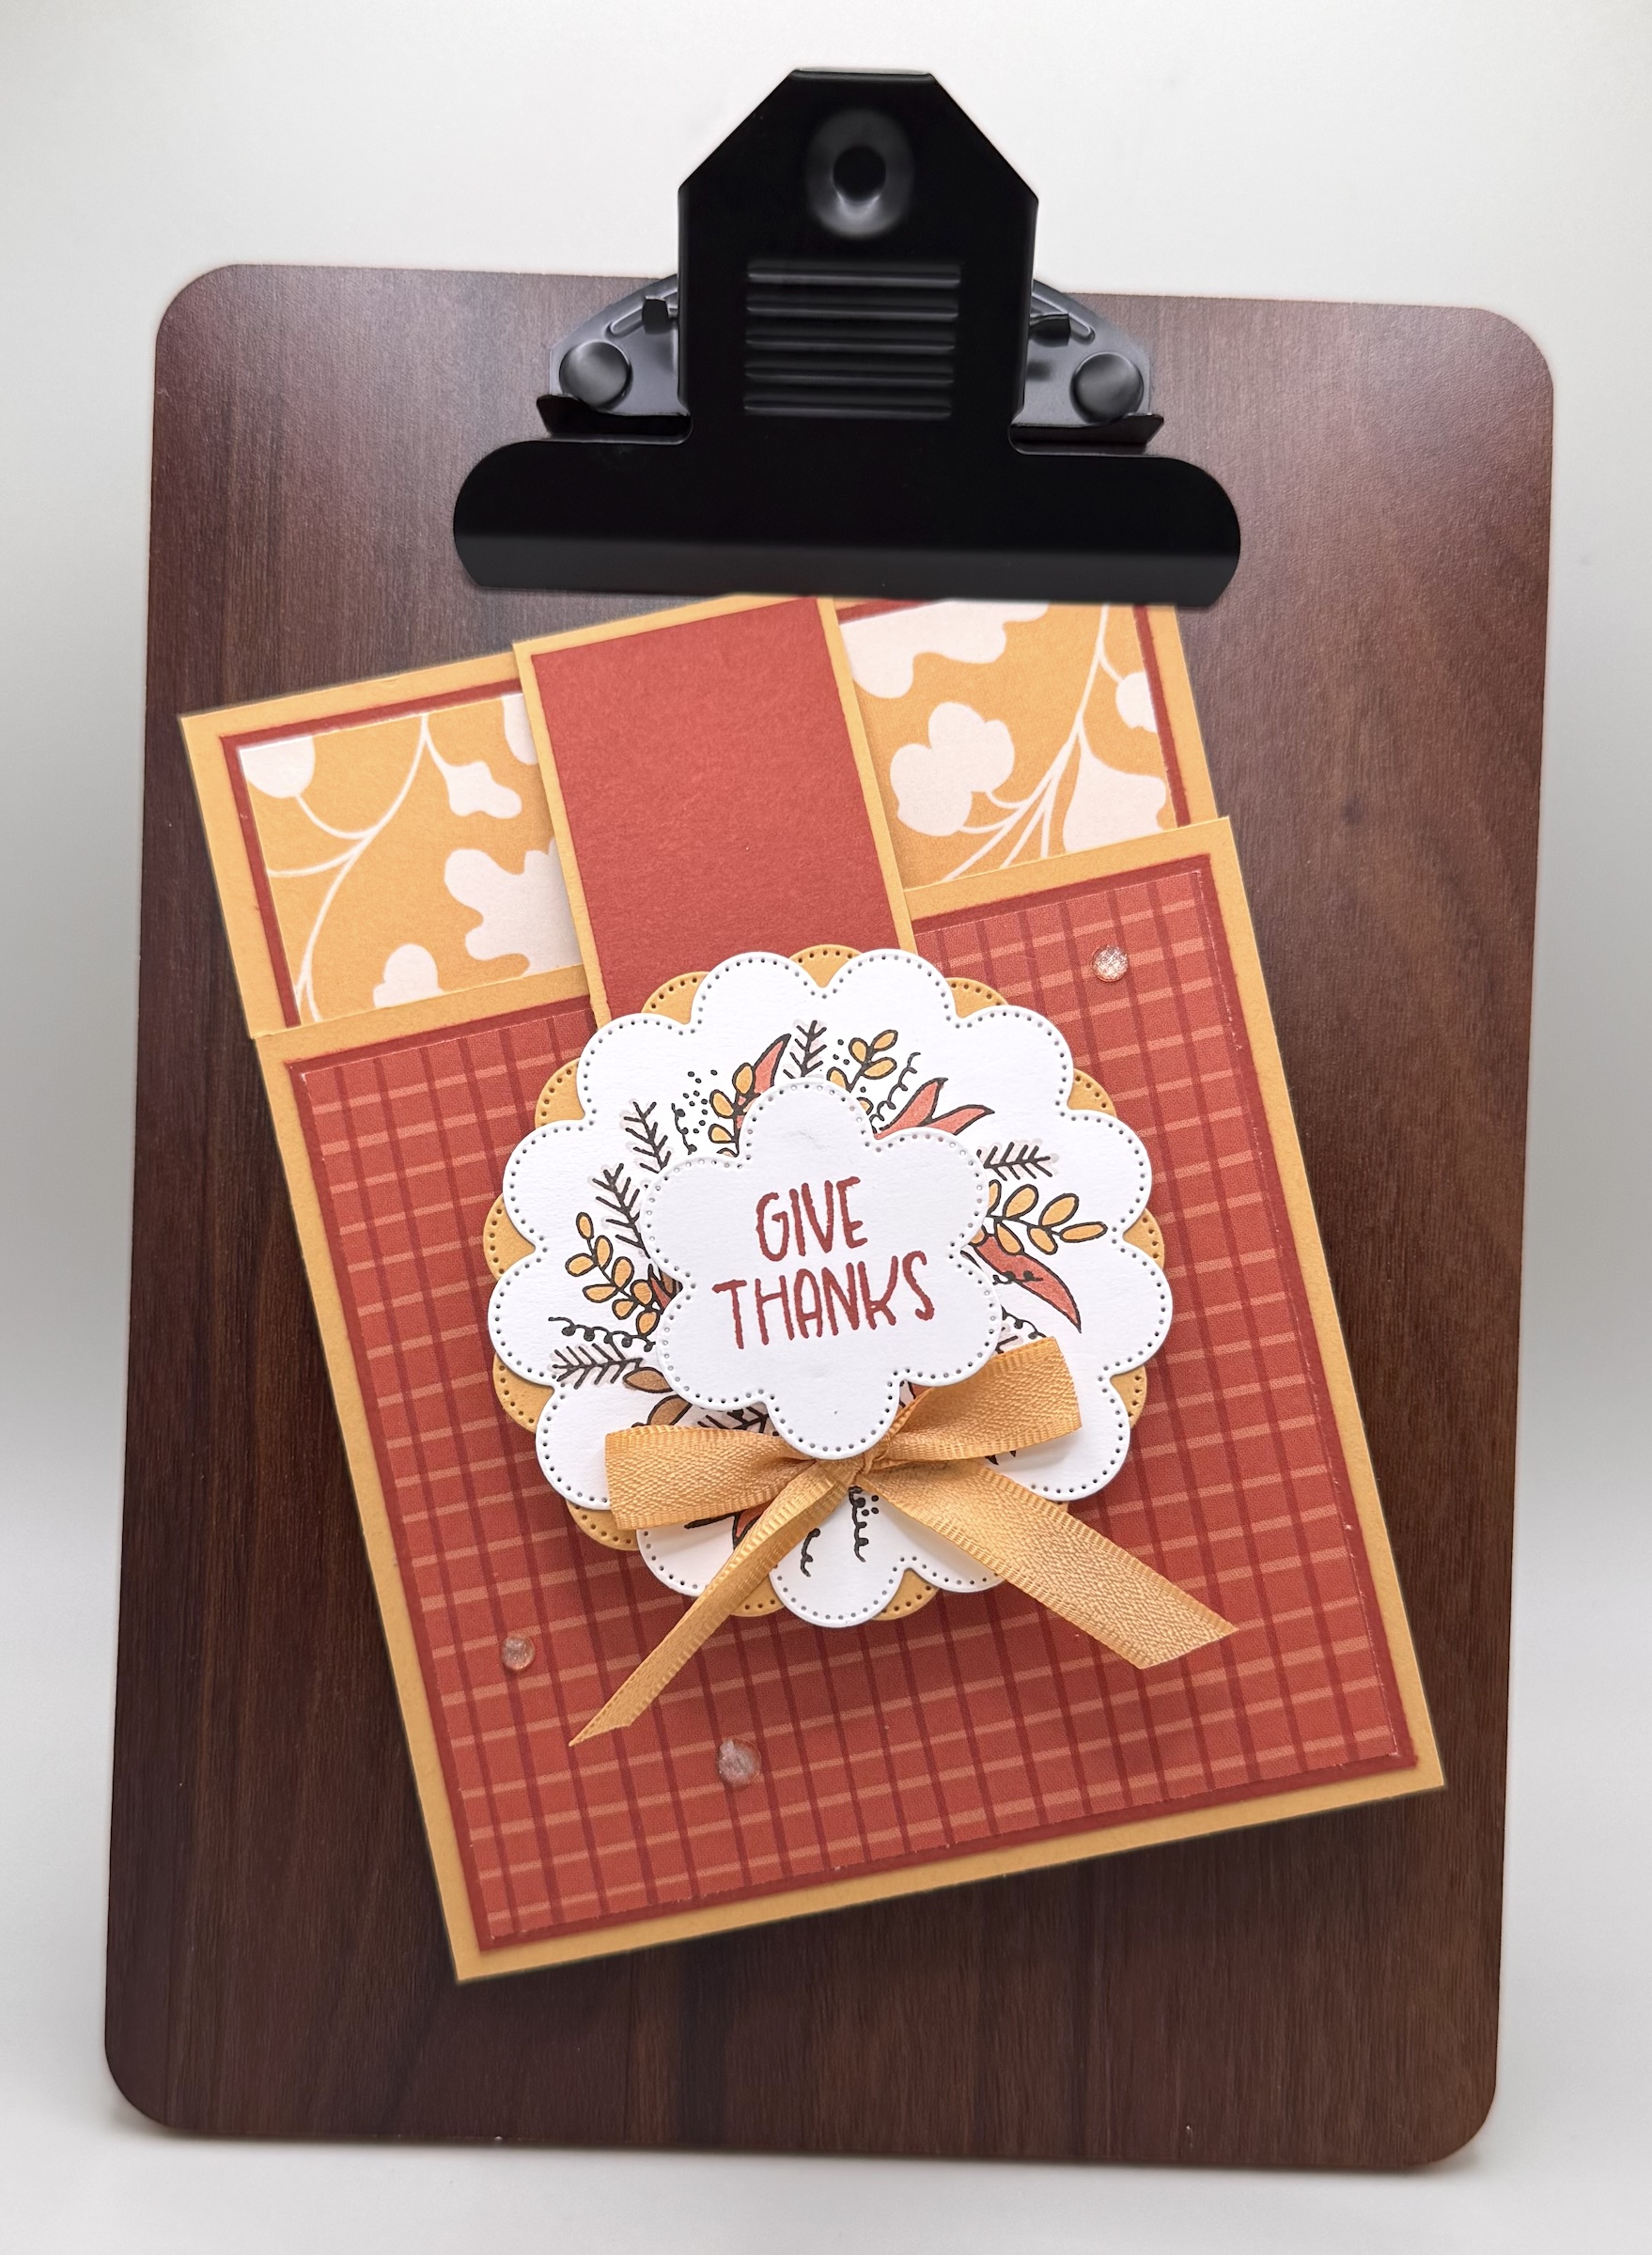
Here’s another fall-themed card for you! This design would also make an excellent Thank You card, especially since the Thanks & Giving Stamp Set includes some wonderful sentiments for just that purpose.
I started with a Golden Glow cardstock card base—love, love, love this color! I layered it with Cajun Craze cardstock, Sunflower Fields Designer Series Paper, and Painted Patch Designer Series Paper.
And don’t overlook the versatility of mixing your DSPs! So many of the Designer Series Papers in the catalog coordinate beautifully with one another. Mixing patterns and collections can give your cards a whole new look.
For the wreath on the front of the card, I die cut three large circles and one small circle using the Scalloped Blooms Dies. I’m so happy these dies carried over into the new catalog because they are incredibly versatile! I stamped the wreath image onto the Basic White scalloped circle and colored the foliage using Crumb Cake, Pecan Pie, Calypso Coral, Golden Glow, and Smoky Slate Stampin’ Blends. I layered a Golden Glow scalloped circle behind the stamped piece and attached it to the front flap. Then I added a little wobbler mechanism to the small scalloped circle and stamped “Give Thanks” on it.
I have to admit, I really enjoy the whimsy that wobblers add to a card! I purchase mine online, and they come in two sizes—a small size like I used here and a larger size for bigger images.
For the inside of the card, I added some simple stamping with Early Espresso and Cajun Craze ink. A little Golden Glow ribbon and a few embellishments finished everything off.
I really love how this card turned out, and I’ll definitely be making about a dozen more as I start crafting my annual Thanksgiving cards!
Here’s what you need to know to create this card.
CUTTING/SCORING MEASUREMENTS
BASE: (Golden Glow) 5 1/2″x8 1/2″, score at 4 1/4″; then rotate so the 4 1/4″ is at the top of your paper cutter and cut from 1 3/8″ down to the 4 1/4″ score line; Use scissors to cut that piece off and you have your flap. Score that flap at 3/8″ to attach to you card base.
FLAP LAYER: (Cajun Craze) 1 1/4″x3 3/4″ **3 1/2″ works too!
INSIDE LAYERS: (Cajun Craze) 4″x5 1/4″; (DSP) 3 7/8″x2 1/2″; (Basic White) 3 7/8″x3 7/8″; (DSP FOR LEFT SIDE) 4″x3 7/8″
FRONT LAYERS: (Cajun Craze) 4″x3 7/8″; (DSP) 3 7/8″x3 3/4″
EXTRAS: Golden Glow Ribbon, Embellishments, Wobbler or Dimensionals.


My First Christmas Card of the Year!
And just like that…I’ve officially made my first Christmas card of the year! 🎄 I know it seems early to be making Christmas cards in September, but I send nearly 100 Christmas cards every year, so I have to start early!
I also like getting an early start because I know many of you are looking for inspiration. Starting now gives you plenty of time to order your favorite products and have everything ready when you sit down to make your own holiday cards.
For this card, I used the Neutral Noel Suite Collection, which is my favorite Christmas suite in the new catalog. It’s definitely one I’ll be reaching for again and again this holiday season.
I love the modern look and clean, neutral color palette. The Neutral Noel 12” x 12” Specialty Designer Series Paper is absolutely gorgeous, with beautiful gold metallic details that add just the right amount of glamour.
The suite also pairs beautifully with the Woodgrain Wonders Designer Series Paper, and the Softly Woven 3D Embossing Folder is simply beautiful. It reminds me of fancy linen and adds such an elegant texture to the card.
I used Mossy Meadow for my card base and layered it with Pecan Pie and Neutral Noel DSP. For the front, I added an oval Basic Beige layer cut with the Noel Tidings Dies and embossed it using the Softly Woven 3D Embossing Folder. The rest of the front is made up of die-cut pieces from the suite, layered together to create the focal point.
And here’s a little confession: I copied the layout straight from the catalog! 😉 After all, the catalog is also an idea book. There’s absolutely nothing wrong with using the beautiful projects Stampin’ Up! provides as inspiration for your own creations.
I kept the inside of the card simple with just a little stamping. With all the beautiful metallic accents on the DSP, I didn’t think the card needed much more!


A Little Scenic Coast Inspiration
I had a lot of fun creating this last card.
I started out planning to make a card using the Thoughtful Octopus Stamp Set. But then I glanced over at the Scenic Coast Suite, and it called to me! I love this suite, and I know many of you have it in your crafting spaces already, so I decided it was time to create a Front Flap Fun Fold using it.
For this card, I started with a Calypso Coral card base layered with Secret Sea and, of course, that gorgeous iridescent Scenic Coast 6” x 6” Designer Series Paper. For the front flap, I die cut two circles using the Stylish Shapes Dies—one from DSP and one from Calypso Coral cardstock. I also used the same circle die along with the next smaller size to create a frame around the DSP circle. I die cut the sailboat and snipped it apart so I could add it to my circle with a dimensional. I also die cut the next layer from Basic White and cut the seashells from a scrap of DSP. Then I sandwiched the net and the flap between the DSP circle and the Calypso Coral circle. This gave the back of the flap a nice, clean finish and created the perfect spot for a sentiment.
If you look at the third photo, you can see how the sentiment fits beautifully on the back of that front flap!
For the inside, I stamped a sunset scene—although now I’m wondering…is it a sunset or a sunrise? 😂 Either way, I love it! I added another sentiment to finish the inside.
This one was so much fun to make!
So Many Possibilities!
One of the things I love most about this Front Flap Fun Fold Card is its versatility.
You can add a pocket—or even two pockets—to tuck in a photo or gift card. That makes this card perfect for Christmas, birthdays, graduations, thank-you cards, and so many other occasions.
I’m also toying with an idea of making the piece on the front removable so it could double as an ornament or even a bookmark.
See? I told you this fun fold was versatile!
I have a feeling I’ll be playing around with this card design quite a bit more.
Give This Fun Fold a Try!
I know you’re going to love making these Front Flap Fun Fold Cards. It’s one of those designs that really gets your creativity flowing.
And isn’t that one of the reasons we love paper crafting and card making so much?
We all have that little spark of creativity, and I think it’s pretty special that we get to share that spark with one another. It’s a little thread of commonality that connects us as crafters and creates such a wonderful community.
So grab your favorite Designer Series Paper, choose some coordinating cardstock, and give this fun fold a try. I can’t wait to see what you create!
Happy crafting, my friends!
Jill