
Are you looking for a simple card that will impress? This shutter card does exactly that. Use all your gorgeous Designer Series Paper and your most fun stamps and dies to create a card that will be loved so much! The shutter is unique – I bet most people have never received a card quite like it (unless you’ve sent them one before!!) This fun fold is so versatile. You can step it up with additional layers or keep it super simple. I know you’ll have fun making this one.


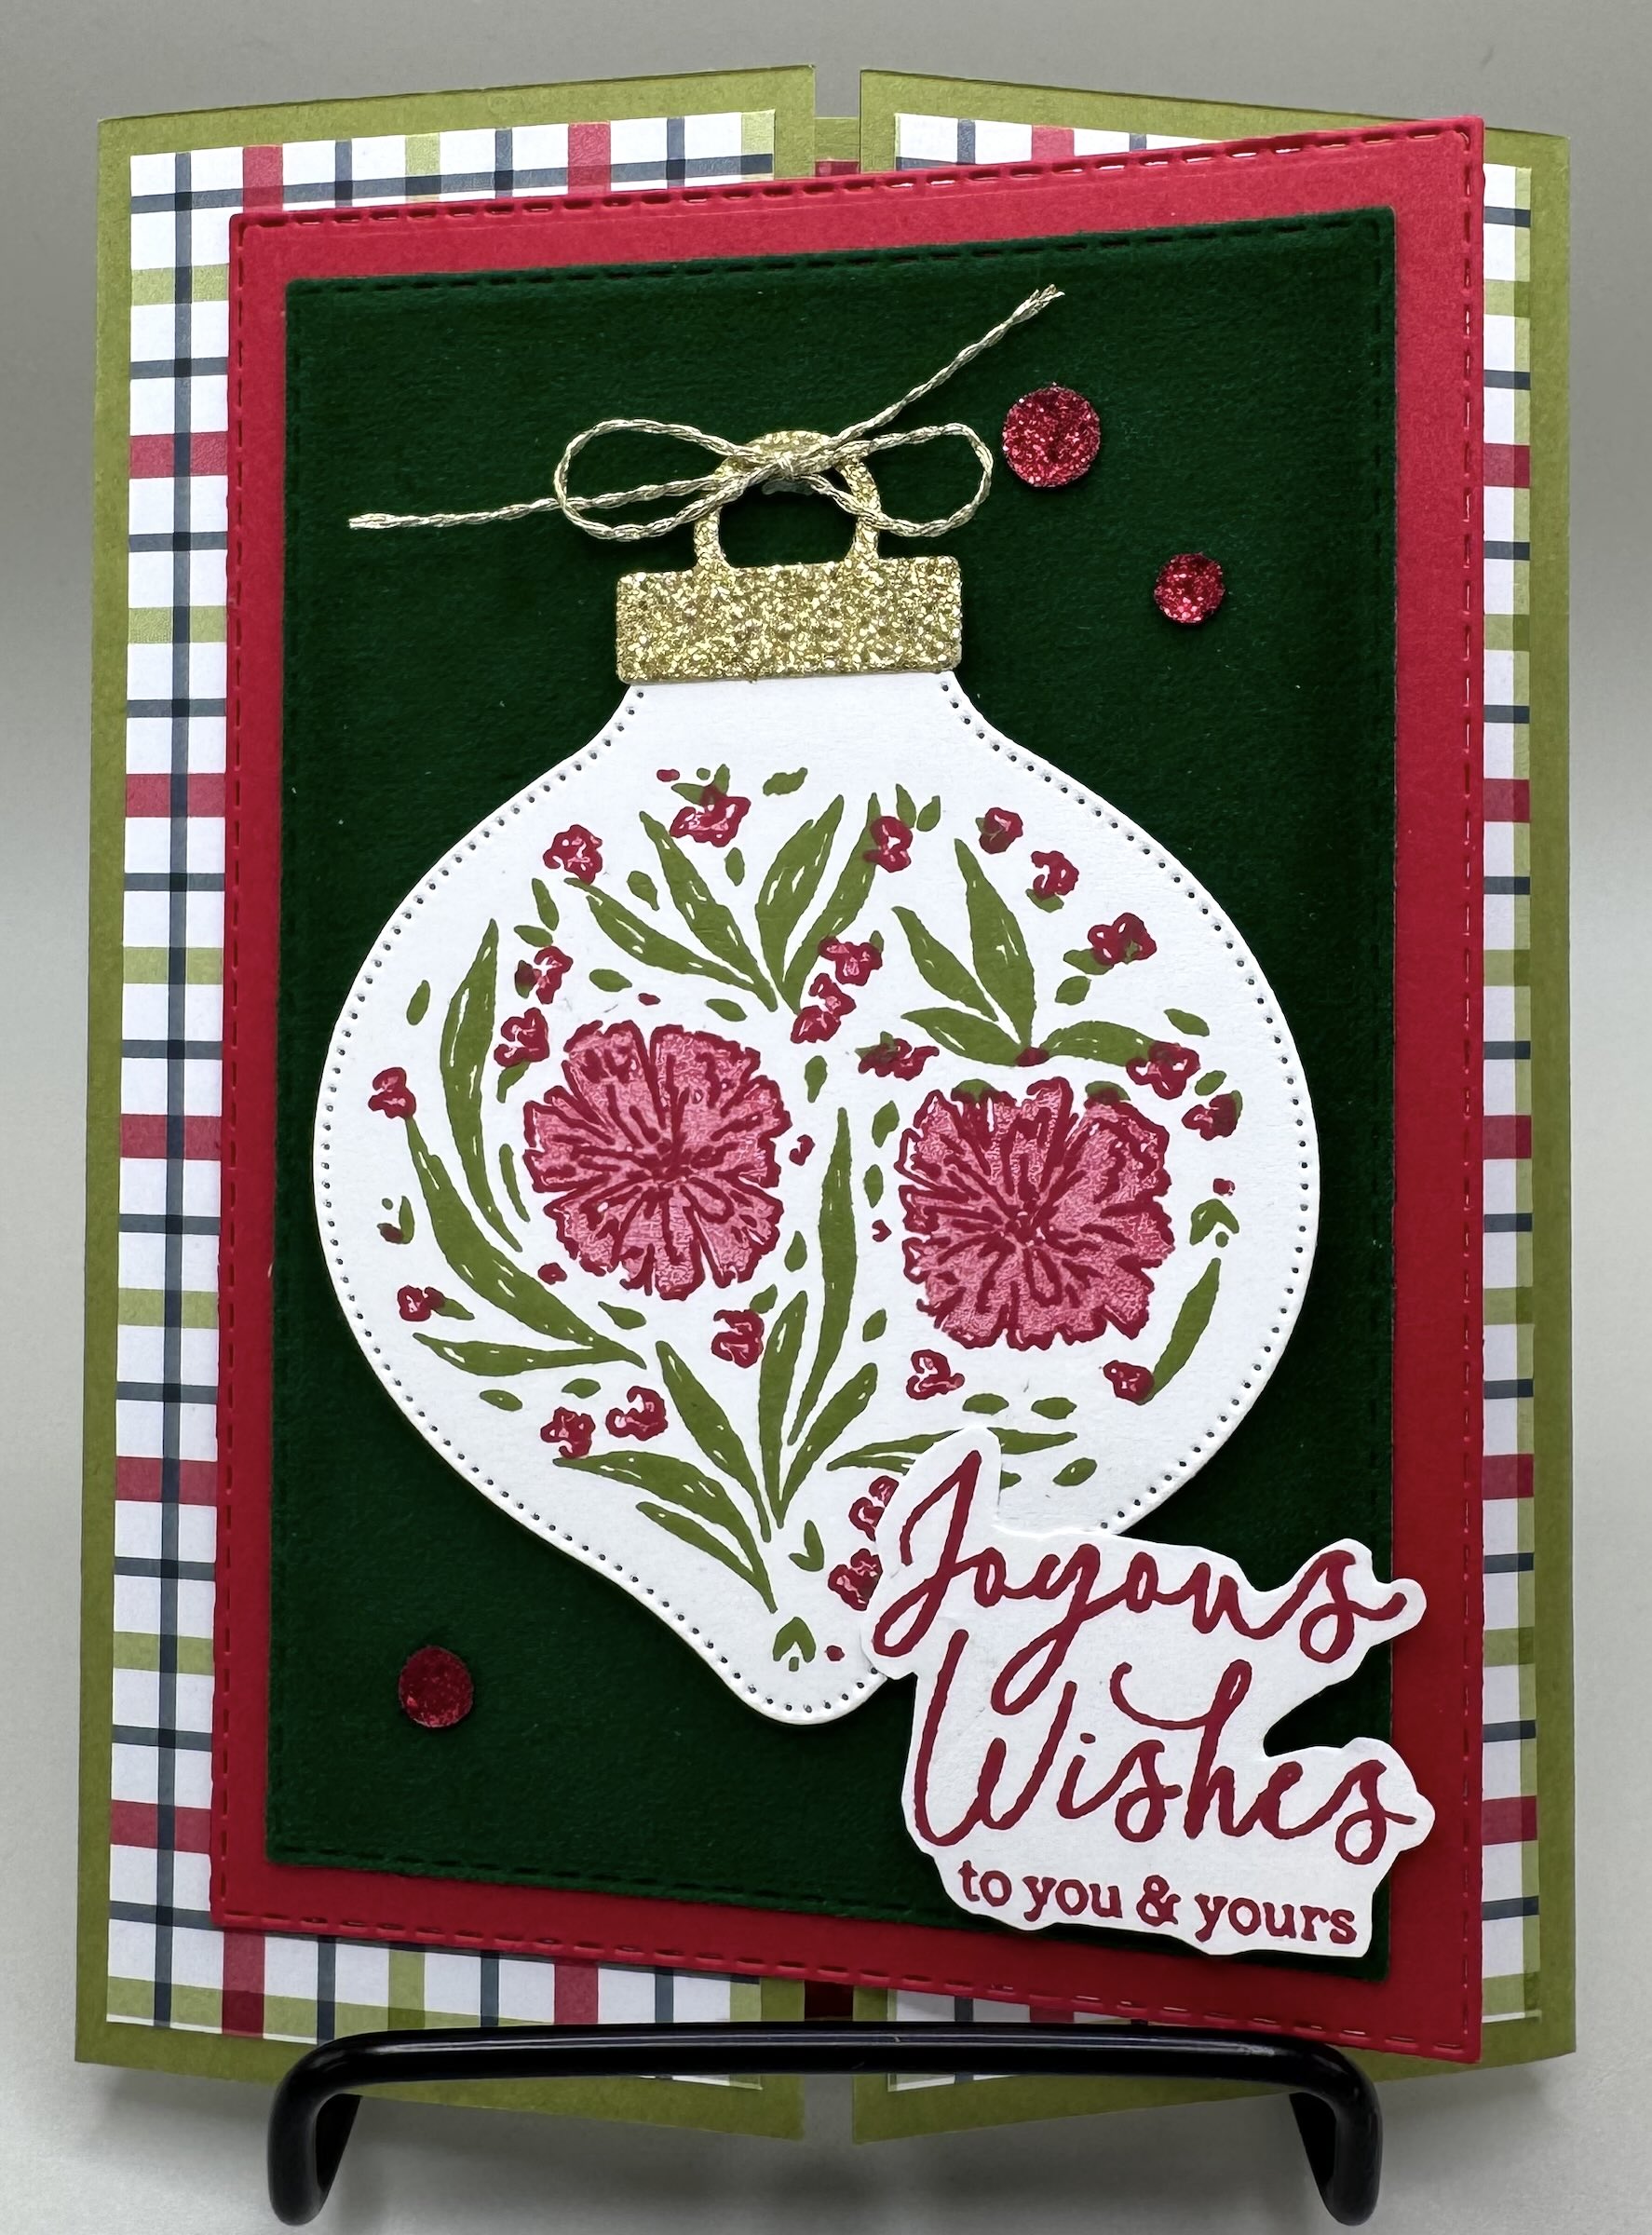
This card will be one of my holiday card options. I just love how it came out. I used a lot of new products here. The Traditions of Christmas Special Designer Series Paper is so pretty. I love how it has a mix of plaids, flowers and some great backgrounds as well. I also used the All Seasons Velvet Specialty Designer Series Paper. I’ve never worked with velvet before and knew I had to try it out. It’s wonderful! I was worried it would be heavy, but it’s not. The back is paper so it’s simple to add to my cards and it isn’t bulky at all. The star of the show here is the gorgeous Bobble Blooms Bundle. This bundle makes the prettiest holiday ornaments and the stamps layer together so nicely.
I used Old Olive Cardstock for the base, the inside panel and the shutters. I paired the DSP for the layers and the inside panel. I used the green shade of the All Seasons Velvet DSP for the front and layered on my pretty ornament. The ornament is stamped in Real Red and Old Olive. I stamped off to create a 3rd shade of Real Red here. I used some Gold Glimmer Paper to die cut the ornament topper (retired), however any metallic paper would look great here. I also added a little bow at the top of the ornament. I like to write messages on my cards so I added a panel to the back of the card. If you use a light color cardstock you can even skip that step. I embellished the front and back of this card with the sparkly Traditional Sparkly Sequins because in my opinion you can never have too much sparkle!
Here’s what you need to know to create this card.
CUTTING/SCORING INSTRUCTIONS
BASE: (Old Olive) 5 1/2″x 8 1/2″, score at 2 1/8″ on each end or score on one end and then manually fold to make the edges meet and use your bone folder to burnish *a great tip to get perfect lines!
DSP FOR BASE: (Traditions of Christmas) 1 7/8″x5 1/4″ (x4) **You can mix and match
INSIDE CENTER PANEL: (Old Olive) 3″x5 1/2″; (DSP) 2 3/4″x5 1/4″
SHUTTERS: (Old Olive) 3 1/2″x4″ (x2), with the long edge at the top, score at 1/2″ on both pieces. Then, find the center point of each piece and cut shutter points. *see video
INSIDE SENTIMENT: (Basic White) Cut circle with 2 3/8″ punch *also used to punch out center panel.
OPTIONAL BACK PANEL: (Basic White) 4″x5 1/4″
**You can step up any of the layers of this card by adjusting your measurements and adding additional cardstock under the DSP and on the back layer.


I used the Festive Friends Bundle for this sample. The base is Pool Party. I layered DSP from Nests of Winter and also used a panel of Silent Snowfall Specialty DSP. The shutters are Real Red this time. I used some of the red All Seasons Velvet on the front for texture and fun. As you can see, I brushed some Real Red on the Silent Snowfall DSP. Then I brushed some Clear Wink of Stella on the snowflakes. It ended up looking a little more pink than red but it’s still pretty. Next time I think I’ll just add some Clear Wink or even just let it be its own pretty self. Oh, and I used the circles from the Stylish Shapes Dies on the front of the card.


I love this last sample. I use Basic Beige and Mossy Meadow and paired it with Beautiful Gallery DSP and the coordinating Beautiful Motifs stamps. I used the square dies from Stylish Shapes this time. I finished the card of with some ribbon (retired) and Antique Pearls. I use the Antique Pearls a lot since they look great on everything! Since this card stock is light I didn’t add a panel to the back this time.
Have you tried a shutter card before? I hope you try this one and love it as much as I do. It’s definitely a fold I’ll be using for my holiday cards this season!
Happy Crafting!
One response to “How to Make a Super Simple Shutter Card”
•
You have inspired me to try this shutter fold card.