
There’s something magical about getting lost in the creative process—and that’s exactly what happened when I made these 3D Shadowbox cards. Music playing, sunshine streaming through the window, and a table full of beautiful supplies… it was the perfect crafting escape. I didn’t realize how much I needed this project until I started, and now I can’t wait to send these special cards off to friends and family!
These 3D Shadowbox cards truly deliver a WOW factor. The dimensional “window” effect is eye-catching and surprisingly easy to create using the Everyday Arches Dies. One of my favorite parts? You’ll have leftover die-cut pieces to use on future projects—always a win when building your stash!


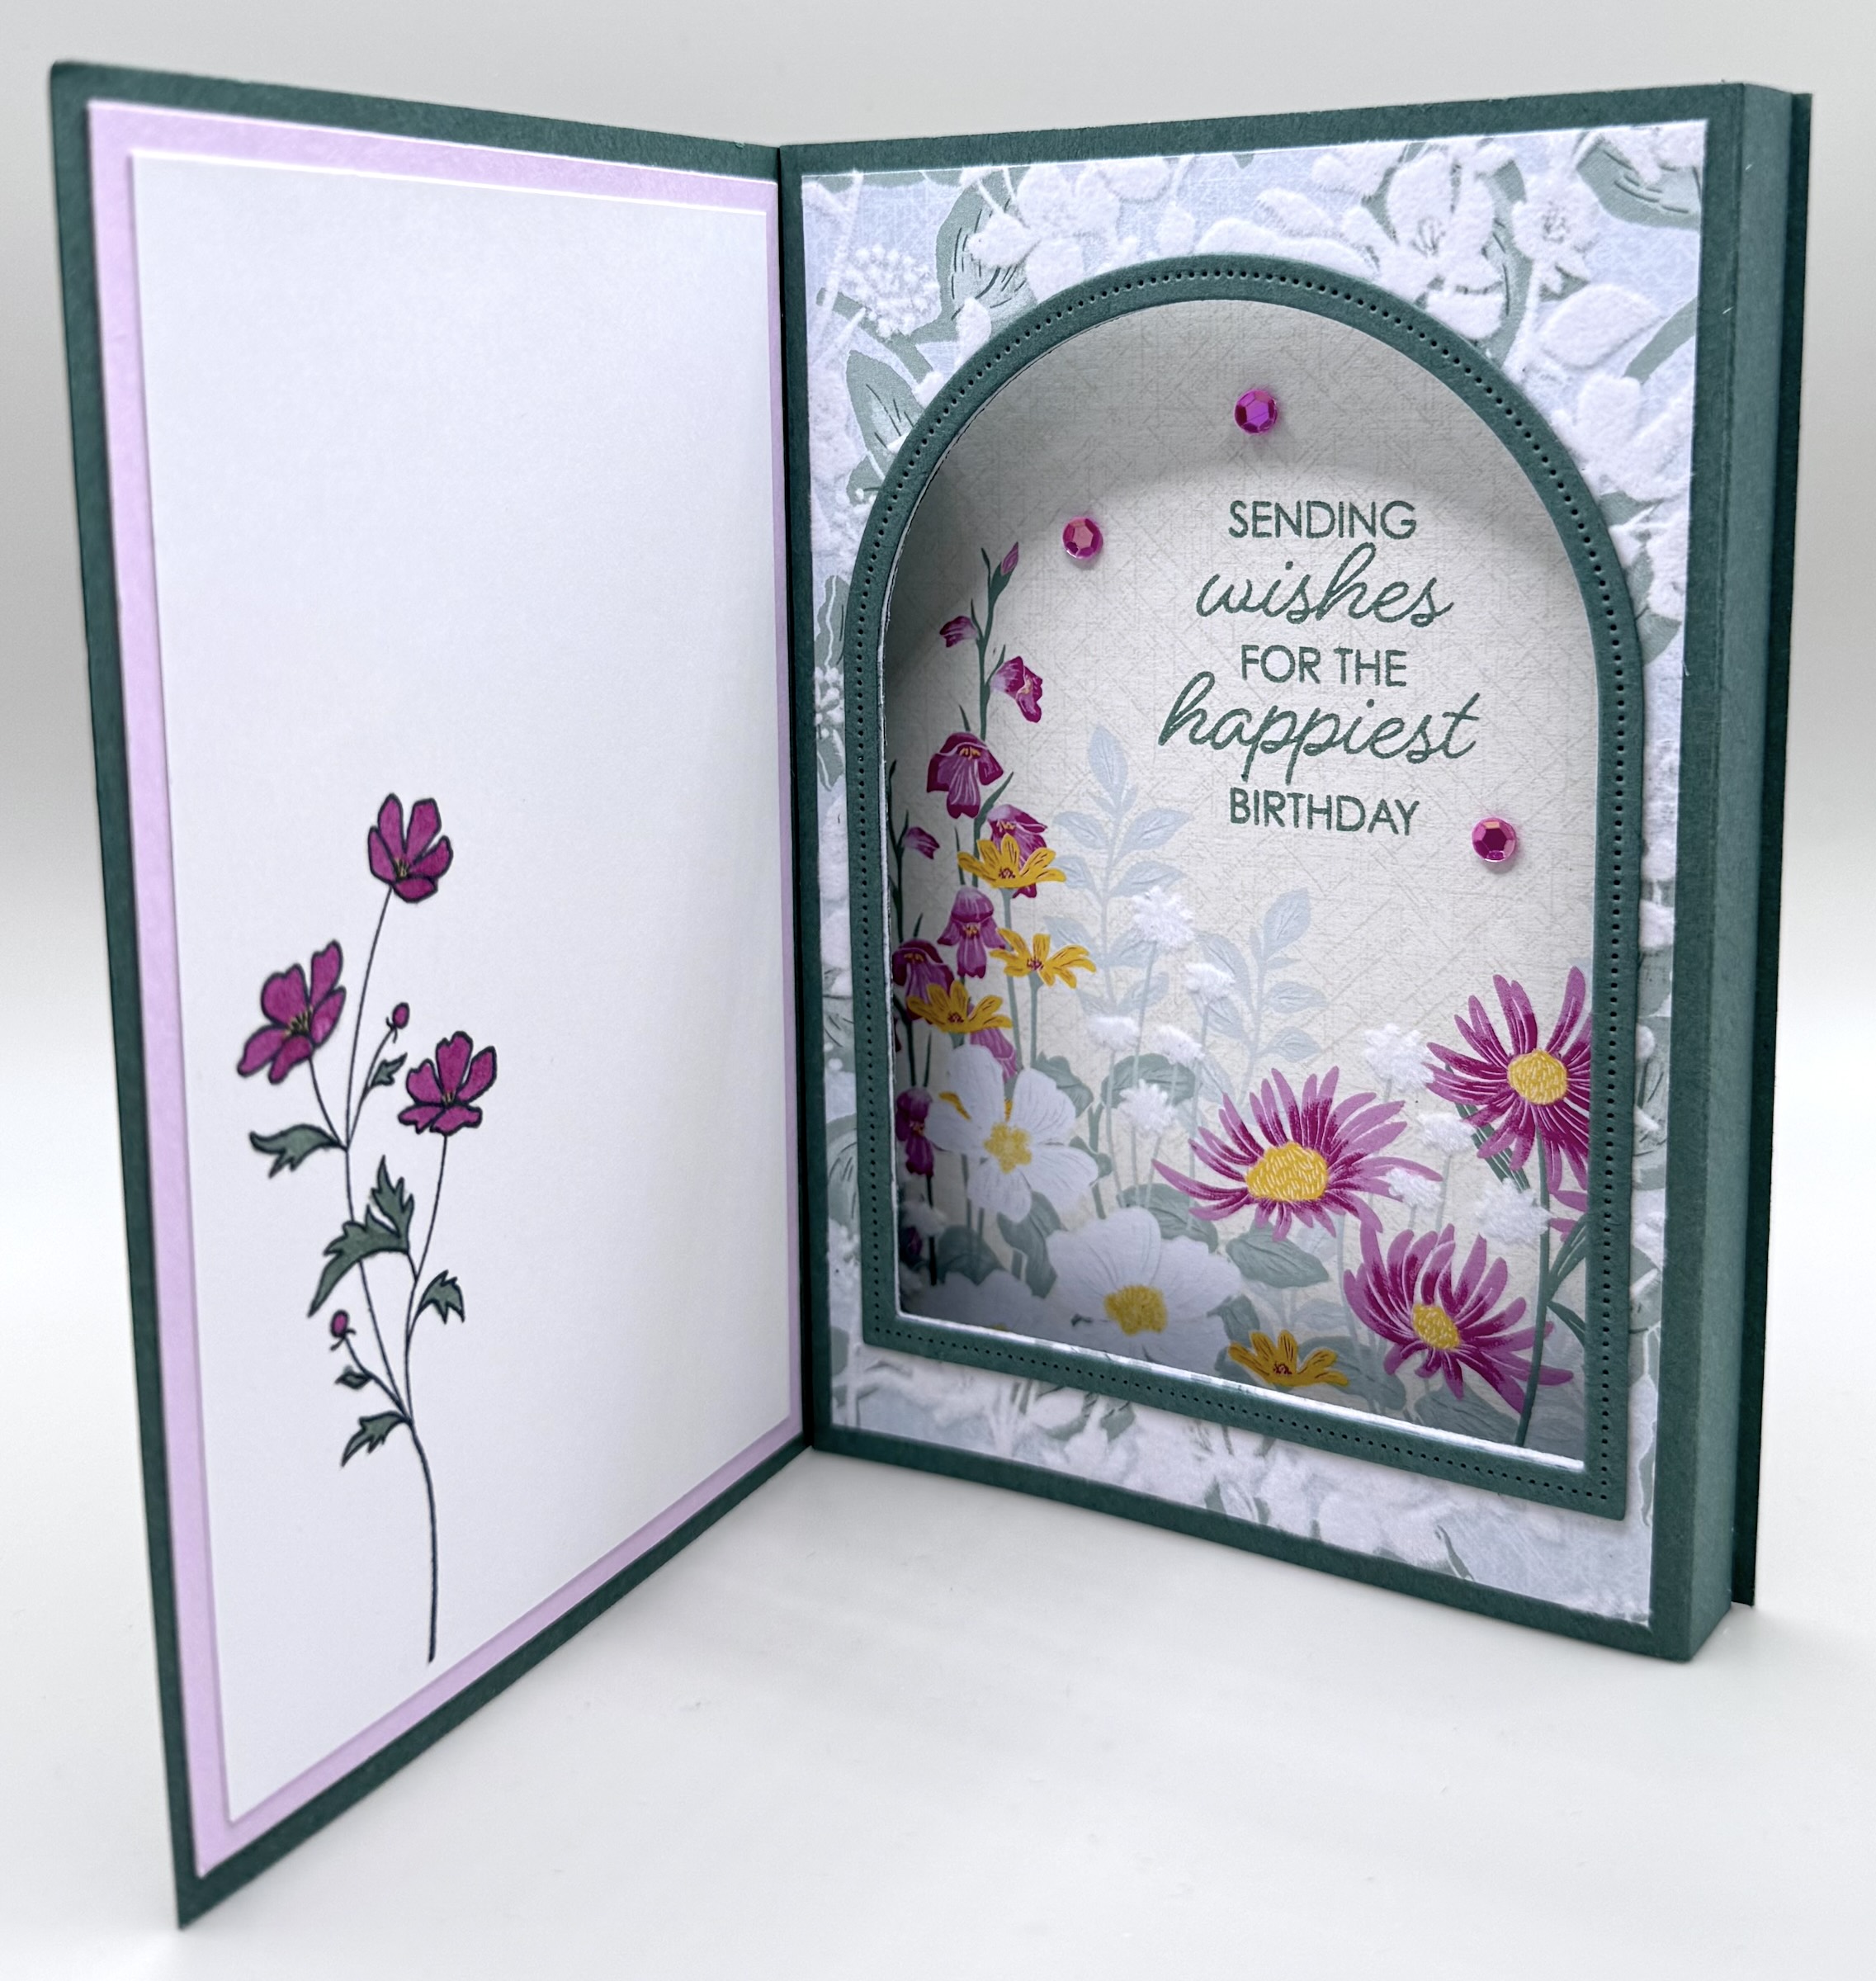
For my first card, I used the gorgeous new In-Color, Peaceful Pine, for the base and paired it with Bubble Bath for a soft, elegant contrast. The Velvet Meadow Suite Collection makes creating stunning cards effortless. The Designer Series Paper is absolutely beautiful, with a woven velvet texture that takes everything to the next level. The suite even includes velvet cardstock that you can stamp on—yes, really! I stamped on the soft pink velvet, die cut it, and used it as a focal point on the front.
Even though the inside looks intricate, it came together simply thanks to the layered papers and textures. I added a stamped sentiment and a floral spray colored with Berry Burst and Peaceful Pine Stampin’ Blends. A bow and a few embellishments were the perfect finishing touches for this sweet design.
Here’s what you need to know to create this card.
CUTTING/SCORING MEASUREMENTS
BASE: (Peaceful Pine) 8 1/4″ x 5 1/2″; with 8 1/4″ at the top, score at 4 3/8″
FRONT PANEL: (Bubble Bath) 4″x 5 1/4″; (DSP) 3 3/4″ x 5″
INSIDE LEFT: (Bubble Bath) 3 5/8″x5 1/4″; (Basic White) 3 3/8″x5″
WINDOW BOX: (Peaceful Pine) 8 1/2″x5 1/2″, with 8 1/2″ side at the top, score at 1/2″, 4 1/4″, and 4 3/4″
BOX LAYER FRONT: (DSP) 3 1/2″x5 1/4″; use 3rd & 4th largest Everyday Arches Dies to cut window
BOX LAYER INSIDE: (DSP) 3 3/4″x5 1/2″


For my second card, I turned to the Scenic Coast Suite Collection. I cannot get enough of those dreamy sunrises—or sunsets! The colors are stunning, and the iridescent shimmer adds such a special touch. I used Blueberry Bushel for the card base, layering it with Balmy Blue and Basic White. The dies allowed me to create detailed elements like the lighthouse, sailboats, and radiant sunbeams. This card is extra meaningful—it’s headed to my niece to celebrate her graduation from the University of Florida. Go Gators!


And finally… my favorite of the three! This card, created with the Moonlit Flora Suite Collection, is truly something special. I loved it so much I had to capture it from multiple angles!
For the front, I added rich texture by inking an embossing folder with Golden Glow before running it through my die-cutting machine. This created a soft, dimensional background behind the raised ferns. I layered on greenery, delicate flowers, sparkly moths, and ribbon for added interest. There’s even a coordinating die for the greeting—such a beautiful detail!
While the front is stunning on its own, the real surprise is inside. When opened, the card reveals a breathtaking shadowbox filled with layered florals and foliage. The Designer Series Paper ties everything together beautifully, while added dimension creates depth and movement. I finished it off with Clear Wink of Stella on the moths and flowers for just the right touch of sparkle.
So what do you think—are you inspired to try a shadowbox card? I hope so! Turn on your favorite music, get into your creative zone, and enjoy a relaxing, joy-filled crafternoon.
Happy crafting!
14 responses to “How to Make a Stunning 3D Shadowbox Card (with Major WOW Factor!)”
•
Hi Jill, love the 3D shadow box cards you made. You make it seems so easy. I tried to print the instructions but it won’t allow me to, do you have a pdf for this card? Thank you in advance. Cheers Toni
•
I asked my spouse about it and he said you should be able to print the page to a pdf. I don’t have it as a separate file.
•
Absolutely Beautiful Card!!
Great Job!!
•
Thank you!
•
I am in love with your cards. They are absolutely gorgeous!
Thanks for sharing.
•
Awww, thanks! You made my day with that sweet comment. I’m so glad you love them!!
•
These are stunning! Can’t wait to try one.
•
Thank you so much!😊
•
This is a beautiful card along with the others. You make it look so easy. Hi from Brisbane Australia.
•
Thank you so much and thanks for watching all the way from Brisbane!!
•
I think this is the 1st video of yours’ I have seen. I love all the cards. I have been trying to find instructions to make this card. Thank you. I can wait to try to make all 3. They are fantastic!
•
I’m so glad you like them! I know your cards will look fabulous!!
•
Thanks for the tutorial on the 3D shadow box. Great samples!
•
You’re welcome. I’m so glad you like the samples and I hope you enjoy making some of your own!