

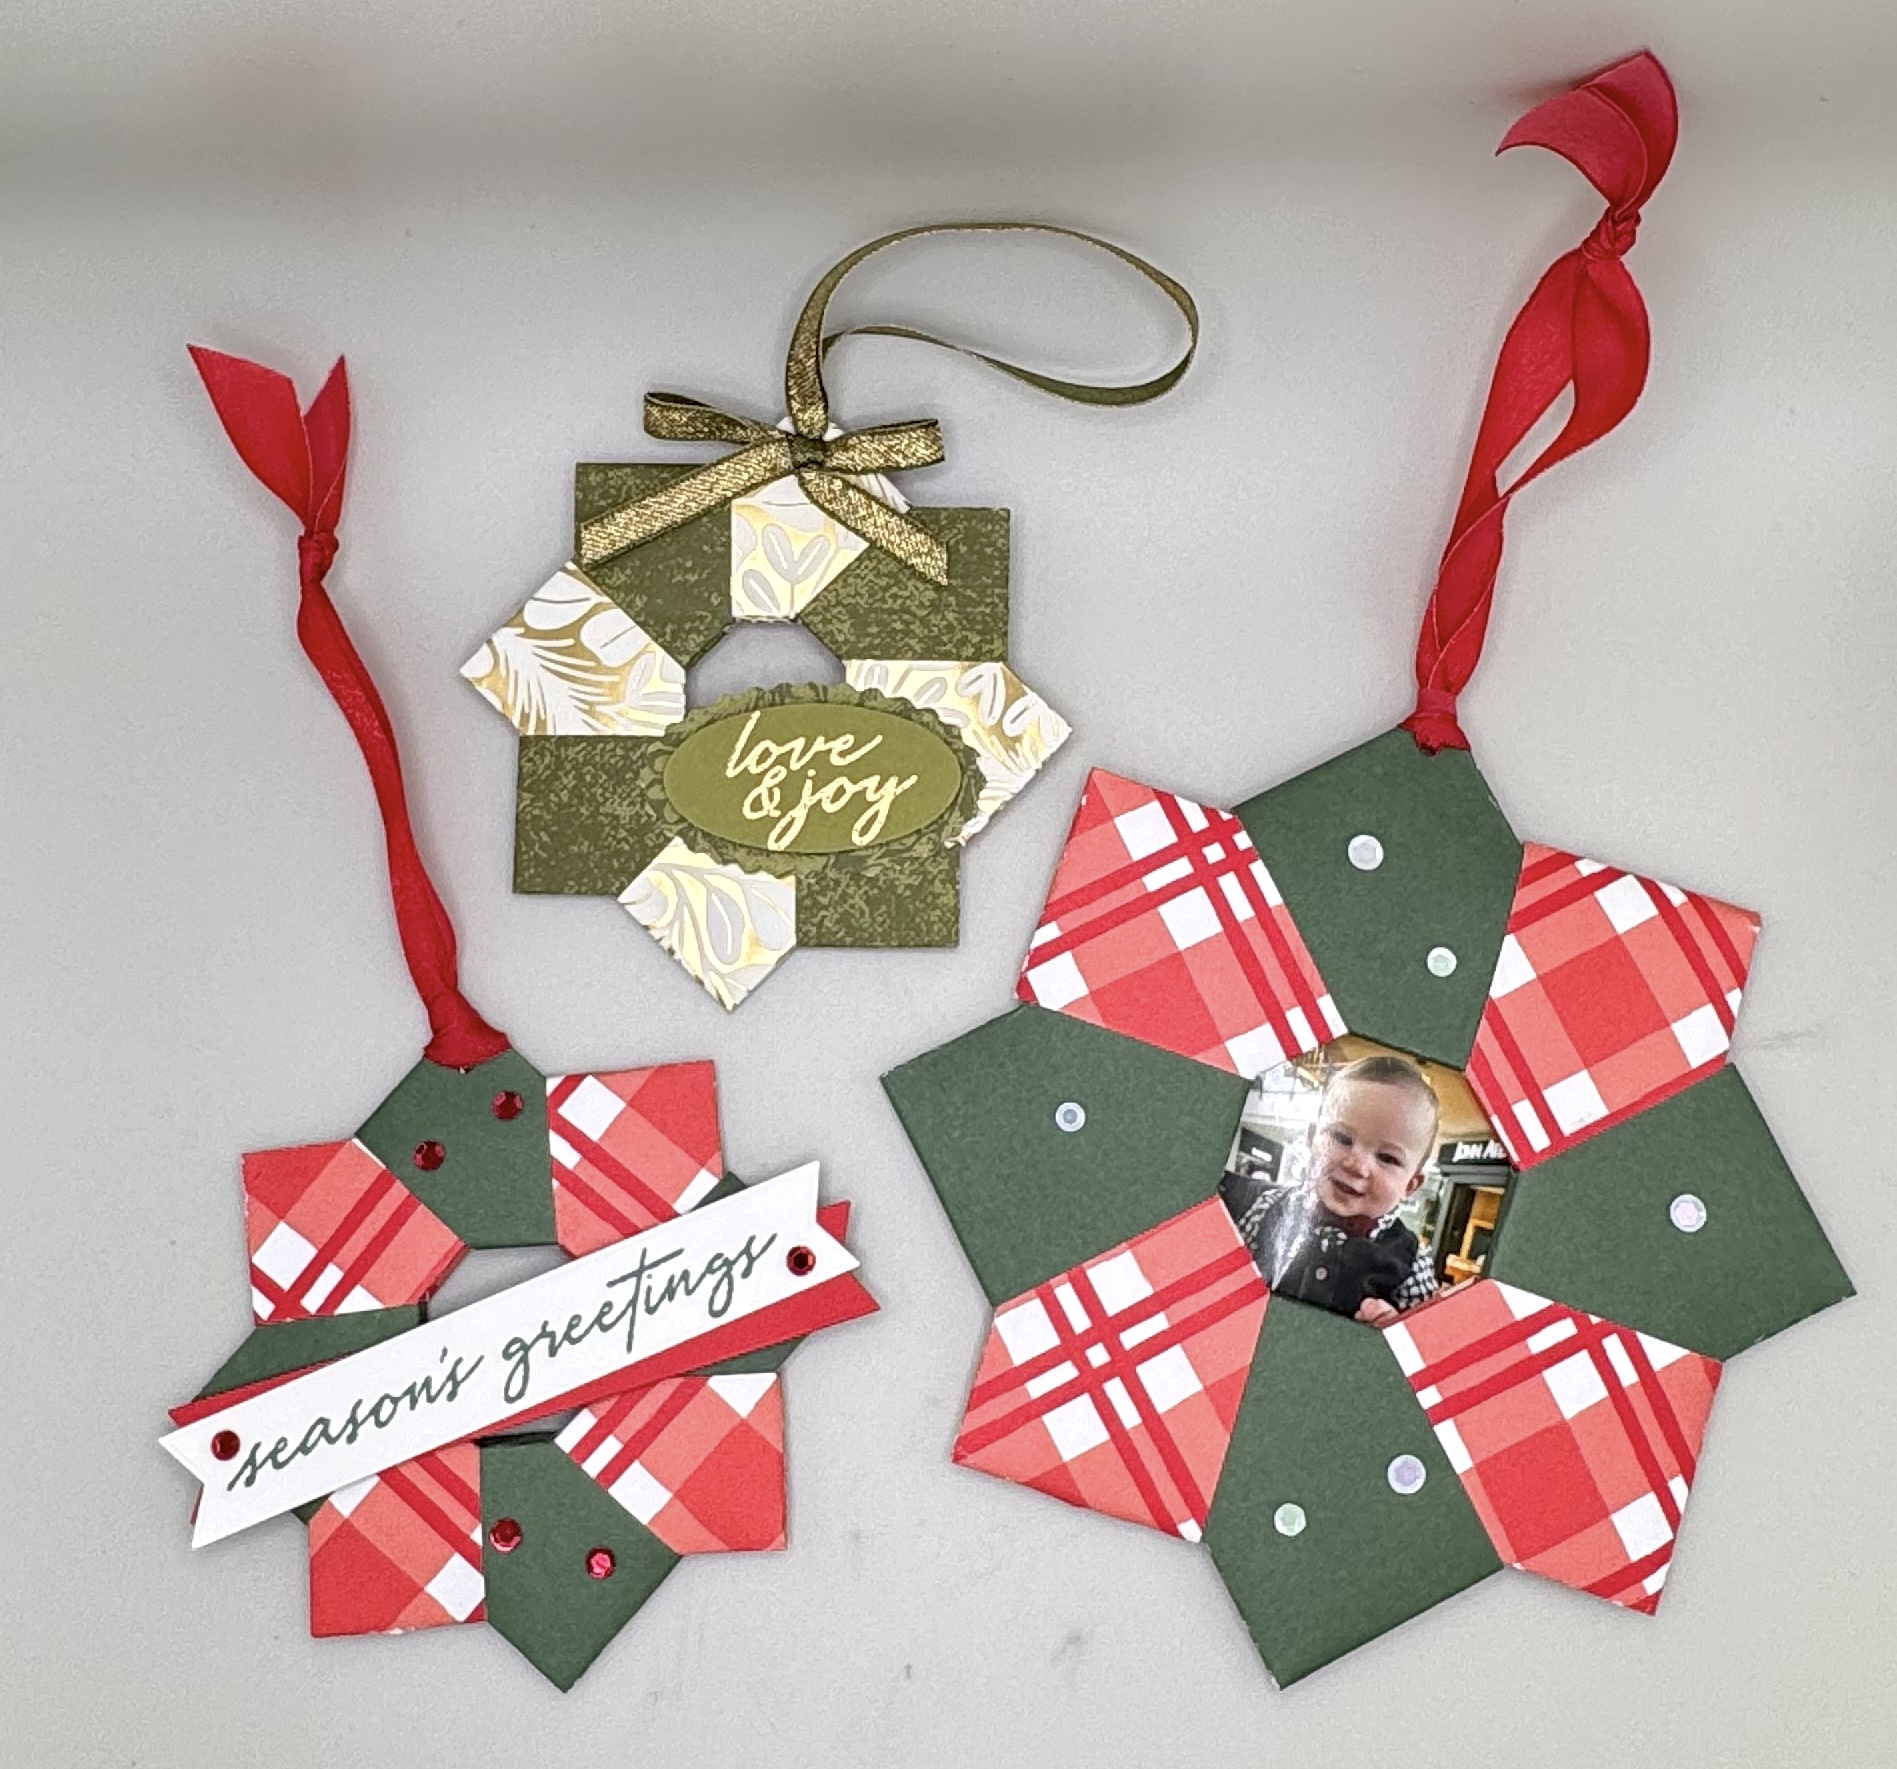
Today’s tutorial is a little different from the card-making tutorials I normally share. We’re stepping away from cards and diving into DIY holiday decorations made with Designer Series Paper!
In this tutorial, I’m showing you how to create four beautiful paper decorations that are surprisingly versatile. They can become Christmas tree ornaments, fancy gift tags, table decorations, place-setting accents, or even little gifts for family and friends.
And the best part? You can personalize every single one. Use your favorite colors, pull out your stash of last year’s Designer Series Paper, or coordinate them with the holiday cards you’re making this year.
I love creating 3D paper projects, and handmade ornaments are something I enjoy making every year. This year, my daughters have requested some ornament-making time, so we’ll be making these together this weekend. I think these projects are perfect for crafting with family or treasured friends.
So put on your favorite holiday pajamas or festive sweater, turn on some music, grab some snacks, and let’s get crafty! These easy DIY holiday decorations are fun to make, fun to share, and something you’ll enjoy bringing out year after year.


1. Origami Wreath
Our first project is an Origami Wreath, and I absolutely love how versatile this little wreath can be.
You can change the size to make a wreath that’s tiny enough for a gift tag or large enough to hold a photo. The larger wreaths make adorable picture frames that look beautiful hanging on a Christmas tree. You could also use them as removable decorations on the front of a holiday card.
There are so many possibilities!
What You’ll Need
For a standard-size wreath, cut:
● Eight 4” x 2” pieces of Designer Series Paper
You can use all the same pattern, or mix two coordinating patterns by cutting four pieces of each.
Want to make a larger wreath? I made my photo wreath using 6” x 3” pieces of DSP. You can make your wreath any size you’d like. Just remember that the length should always be twice the height.
How to Make the Origami Wreath
Fold each piece of DSP in half. Then fold the open corners up toward the folded edge to create a triangle on each end. Fold the piece in half again.
Repeat this process with all eight pieces.
The magic happens when you begin assembling the pieces. The points of each section tuck into the pocket of the previous section, creating the beautiful wreath shape.
This part is much easier to understand when you can see it, so be sure to watch the video tutorial for the complete assembly.
Once your wreath is assembled, I like to add a little liquid glue to each section to make sure everything stays securely together.
To finish your ornament, punch a hole and add ribbon, beads, a tag, or any other embellishments you love.
And if you made a larger wreath, simply cut a photo to fit in the center. What a sweet handmade gift!
Want to watch the Origami Wreath tutorial?
Forward the video to 58:24 to jump right to this project.


2. Easy Paper Angels
Are you ready to make the easiest—and cutest—little paper angels?
These are so simple to make, and they’re easy enough that even little crafters can join in. They would be a wonderful project for a family crafting day or a holiday craft night with friends.
All you need is your favorite Designer Series Paper. I especially love using paper with metallic accents for these because they give the angels a beautiful holiday sparkle.
What You’ll Need
● Designer Series Paper
● A 2 3/8” circle punch or larger or a circle die approximately that size
● Silver or coordinating cord or ribbon
● Bead for the head,
● Adhesive
Larger circles will create larger angels.
Start by cutting three circles from your Designer Series Paper. Fold each circle in half.
I used my new pink WorkPro Cordless Hot Glue Gun to secure the silver cord inside the first circle. Then I used liquid glue to adhere the folded circles together. You can also use hot glue for the entire project if you prefer.
Layer two of the folded circles together to create the angel’s robe. Add the third folded circle to the back to create the wings.
Finish your angel with a bead for the head, and you’re done!
These little angels would also make beautiful handmade gift tags. Imagine one attached to a package with a recipient’s name tucked underneath. So sweet!
Want to see exactly how I made these paper angels? Jump to 19:19 in the video.You can view the video tutorial for this product by forwarding the video to 19:19.


3. Paper Pumpkins
I LOVE THANKSGIVING! It’s my favorite holiday, and this year I’m hosting Thanksgiving dinner at the RV for several family members. I’m so excited!
Hopefully, we’ll have beautiful weather because we’ll be in Florida, and I’m hoping we can enjoy dinner outside.
These little DIY paper pumpkins are going to be sitting at each place setting. I’m planning to add a little name tag to each one so everyone at the table feels extra special. And the best part? They can take their pumpkin home with them afterward!
These pumpkins are addictive to make. Once you make one, you’ll be a pro!
What You’ll Need
Choose some of your favorite fall-colored Designer Series Paper and cut:
● 1” x 12” – 1 piece, scored every 1/4”
● 1 1/4” x 12” – 2 pieces, scored every 1/4”
● 1 1/2” x 12” – 3 pieces, scored every 1/4”
Time-Saving Tip!
Here’s a tip that will save you a TON of time.
Instead of cutting all those strips individually, start with one 8” x 12” piece of Designer Series Paper. With the 12” side at the top, score every 1/4” across the entire sheet. Then cut the sheet into the three different strip widths.
So much faster!
Once your strips are cut and scored, accordion fold each one. I like to start and end with a mountain fold.
Glue the ends of each strip together by bringing the first and last mountain folds together. Flatten each circle into a medallion and hold it in place while you secure the center.
This is one place where I definitely recommend hot glue. It sets much faster than liquid adhesive. My hot glue gun takes about 30 seconds on the low-heat setting to secure these paper medallions.
Once your medallions are made, stack them together using hot glue in the center of each layer.
Stack the Pumpkin From Bottom to Top:
1. 1 1/4” x 12” medallion
2. Three 1 1/2” x 12” medallions
3. Another 1 1/4” x 12” medallion
4. 1” x 12” medallion
To give the pumpkin a nice, clean bottom, I die cut two circles using the smallest circle die from the Stylish Shapes Dies. Add one circle to the bottom of the pumpkin.
The other circle goes on top. Punch a hole in the center and add a pumpkin stem. I made mine using about a 1” piece of leather lacing.
Hot glue the top circle and stem into place, then decorate with leaves and ribbon.
I’m also planning to pick up some wire at the craft store so I can add those cute little curly pumpkin tendrils. I think that will be the perfect finishing touch!
Want to watch the paper pumpkin tutorial? Jump to 27:30 in the video.


4. Paper Medallion Ornament
Now that you know how to make the paper pumpkins, this beautiful paper ornament will be a breeze!
It uses essentially the same medallion technique, just with different strip sizes.
I love making these ornaments because they’re sturdy, easy to customize, and absolutely gorgeous hanging on a Christmas tree. You can decorate them with ribbon, beads, glitter, embellishments—or keep them simple and let the Designer Series Paper do all the work.
I make these every year, and they’re a great way to use up leftover holiday DSP from previous years.
What You’ll Need
Choose a double-sided Designer Series Paper for the prettiest effect, although single-sided paper works beautifully, too.
Cut:
● 1” x 12” – 2 pieces, scored every 1/2”
● 1 1/4” x 8” – 4 pieces, scored every 1/2”
● 1 1/2” x 10” – 2 pieces, scored every 1/2”
For the 1 1/4” pieces, use household tape to join the pieces together, creating two 1 1/4” x 16” strips.
Do the same with the 1 1/2” pieces to create two 1 1/2” x 20” strips.
Accordion fold all of your strips.
Create your medallions using the same hot-glue technique as the pumpkins. Then stack the medallions from bottom to top:
1. 1” x 12”
2. 1 1/4” x 16”
3. 1 1/2” x 20”
4. 1 1/4” x 16”
5. 1” x 12”
This creates that beautiful round ornament shape.
To finish your ornament, hot glue a piece of ribbon or cording between the folds of the top medallion. Then decorate it however you like with beads, additional ribbon, tags, glitter, or embellishments.
I think adding glitter or a few embellishments along the edges would be gorgeous, too!
Want to see the complete ornament tutorial? Jump to 40:48 in the video.
Which One Will You Make First?
I hope these four DIY Designer Series Paper holiday decorations have inspired you to think beyond cards and find new ways to use your favorite patterned paper.
You could make these projects for your own home, decorate your Christmas tree, create place-setting decorations for Thanksgiving, make personalized gift tags, or gather your favorite people together for an afternoon of crafting.
And you don’t have to wait for the holidays to make them! These projects can be customized for birthdays, baby showers, parties, weddings, or any celebration where you want a little handmade touch.
Will you be making some of your own personalized holiday decorations this year? Have you tried any of these projects before?
I’d love to know which one is your favorite!
My WorkPro Cordless Hot Glue Gun
I’ve also been using my pink WorkPro Cordless Hot Glue Gun, and I absolutely love it for projects like these.
It charges quickly and the charge lasts long enough for most of the projects I’m working on. I love not having a cord getting in the way, and because it stands upright, I don’t end up with puddles of glue all over my workspace.
It also comes in its own cute carrying case and includes a large pack of 50 clear and colored glue sticks.
During the month of October, you can grab the pink edition using my affiliate link and discount code below.
Affiliate link: WORKPRO Cordless Hot Glue Gun, https://www.amazon.com/dp/B0DL9MPB8R?th=1
Discount code: WPPINK, valid 10/1-10/31, discount: Extra 5% + Free Shipping, can be stacked with other site promotions/discount codes
Happy crafting, my friends! I hope you find a little time this holiday season to make something beautiful—and maybe make a few memories while you’re at it.
Leave a Reply